Text and photos: Chloé Comte
__
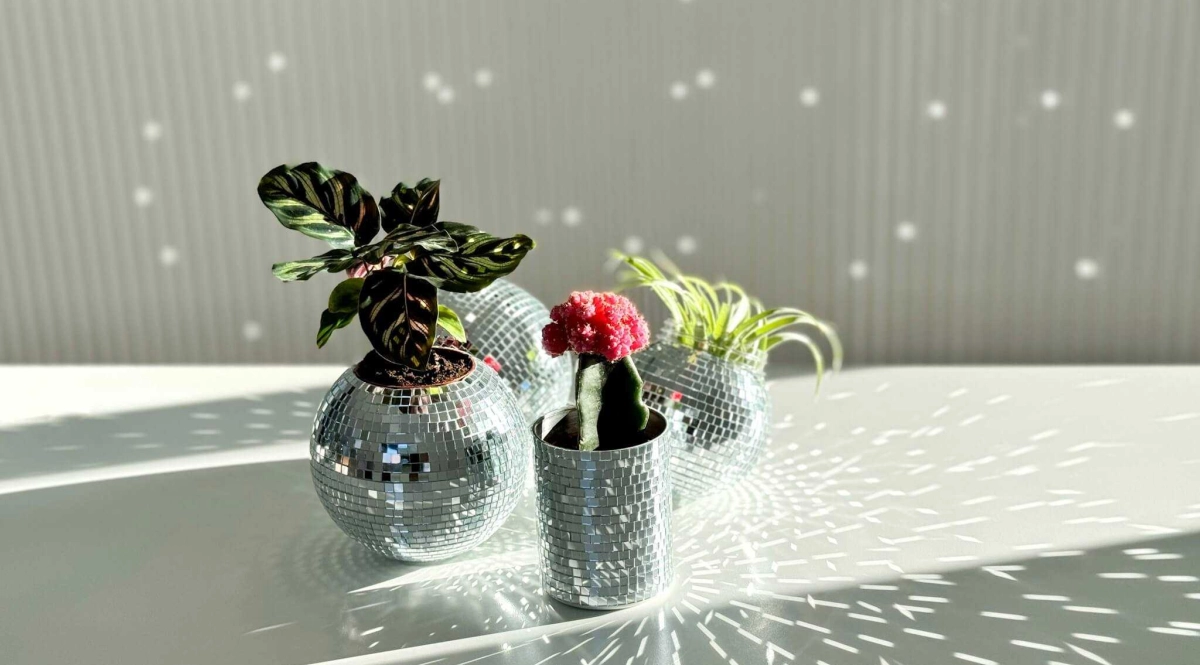
If you too are attracted to the current decor trend and want to bring a bit more life to your decor without changing everything; I suggest you see how to easily create "disco ball" style pots for your plants!
For this DIY, I created 3 different ones. 2 with new containers whose primary function I changed, and the 3rd from a pot I no longer used, which I upcycled.
Without further ado, let me show you the video tutorial, followed by all the details step by step.
Materials:
– Mini-plants (I used a mini Calathea makoyana, a Gymnocalycium mihanovichii cactus in their mini-pots, and a tillandsia nana).
– Styrofoam ball (easily found in $1 stores).
– Snow globe (easily found in $1 stores).
– Precision knife or retractable blade knife.
– Mod Podge or white glue
– Brush
– Degreasing cleaner (dish soap) and rubbing alcohol

Steps for the styrofoam ball:
1- For the styrofoam ball, trace the top of the mini-plant pot on the ball using a pen.

2- Hollow out the pot's placement in the styrofoam ball using a precision knife or retractable blade knife.

3- Test the size of the hole by inserting the pot so that it fits completely.

4- Once the hole is the right size, secure it so that the styrofoam doesn't crumble further by fixing it with Mod Podge or white glue. Let it dry.

5- Once the glue is completely dry, cut simple strips of self-adhesive mirrors, to easily place them on the styrofoam ball

6- Cover the entire ball, starting by sticking the 1st strip of mirrors around the edge of the hole ready to accommodate the potted plant

7- Gently place the plant and its pot in the mirror-covered ball and place it in the sun!

Steps for the upcycled pot:
1- Clean the outside of the pot to be upcycled with dish soap and rubbing alcohol to remove any glue residue or dirt.
2- Dry the pot and cut simple strips of self-adhesive mirrors to arrange them in a staggered pattern

3- Cover the entire pot with self-adhesive mirrors.

4- Place the potted plant in the upcycled pot with mirrors and place it in the sun!

Steps for the snow globe:
1- Cut simple strips of self-adhesive mirrors to easily place them one by one.

2- Cover the snow globe with mirror strips, starting by sticking the 1st strip around the edge of the globe's opening

3- Place the tillandsia in the opening and place the new air plant stand in the sun!

Tips and tricks:
– To ensure the disco pots are stable, you can create a flat base by cutting a piece of the ball with a retractable blade knife or secure them with Fun-Tak (blue or white sticky putty).
– To water your mini-plants, since they remain in their original pots, simply take them out of their disco pots and replace them once watered.
– For this DIY, I chose only mini-plants to avoid having something too heavy to place in the ball pots and to have better stability.
All that's left is to wish you a sparkling DIY project and a great break week!
Tips and advice
